
Crochet Baby Blanket: Beautiful Gingham Design with Granny Squares
A handmade crochet baby blanket is a thoughtful way to welcome a new arrival, especially when it features a classic gingham design. With its soft colors, neat squares, and decorative border, this project brings together traditional crochet techniques and the familiar charm of a checked fabric pattern.
This gingham-inspired blanket uses solid granny squares in three coordinating colors. Rather than working the entire blanket in continuous rows, you create individual squares and join them to form a checkerboard effect. A contrasting crochet border completes the design.
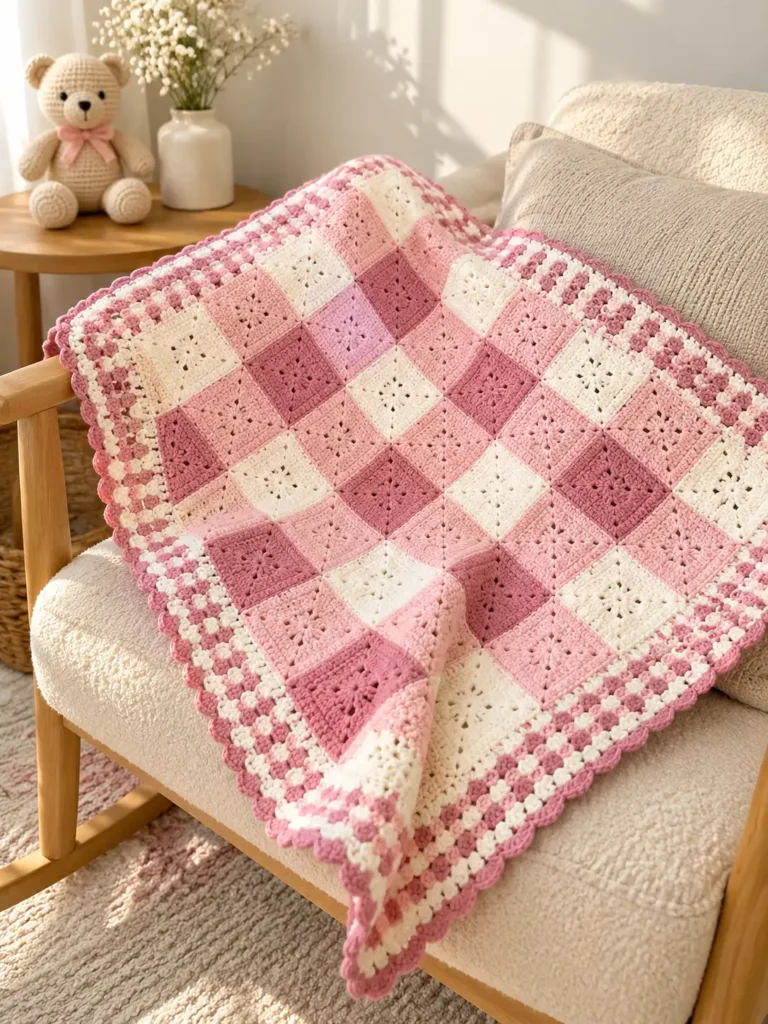
Table of Contents
What Makes This Gingham Crochet Baby Blanket Special?
Gingham is a traditional checked pattern created by combining light, medium, and darker tones. Although it is commonly associated with woven fabric, the same visual effect can be recreated using crochet squares.
The blanket features three colors:
- Cream or off-white for the lightest sections.
- Light blue for the main colored squares.
- Dark blue to provide contrast and define the checked design.
When these colors are arranged together, the individual squares create a coordinated gingham pattern.
One advantage of this construction method is its flexibility. Each square is made separately, allowing you to work on smaller sections before assembling the finished blanket.
The original project measures approximately 37 × 34 inches (94 × 86 cm). Its size can be adjusted by changing the number or dimensions of the squares, although doing so will also affect the yarn requirements.
Materials Needed for a Crochet Baby Blanket
The original project uses double knitting (DK) yarn, which is comparable to light worsted yarn. The designer selected soft, washable, durable yarns suitable for a baby blanket.
Yarn and Crochet Hook
For the original blanket, the materials are:
- 1 × 100 g ball of cream or off-white DK yarn.
- 2 × 100 g balls of light blue DK yarn.
- 1 × 100 g ball of dark blue DK yarn.
- 4.5 mm crochet hook.
The original blanket combines different yarns, including cream and light blue acrylic yarn from Hobbycraft’s WI Premium Acrylic range. The darker blue yarn came from the designer’s existing supplies.
The important color consideration is to choose two shades of the same color family, one light and one dark, alongside a neutral cream or white.
This combination gives the blanket its recognizable gingham appearance.
Choosing Suitable Colors
Although the original blanket uses blue and cream, the gingham concept can be adapted to other coordinating colors.
For a balanced appearance, the light and dark shades should be noticeably different. The neutral yarn creates the palest areas of the pattern, while the darker shade adds definition.
Using similar yarn weights across all three colors also helps the individual squares maintain a consistent appearance when joined.
How to Make the Gingham Crochet Baby Blanket
The main section of this crochet baby blanket is constructed from solid granny squares.
Unlike traditional open granny squares, solid granny squares create a more continuous crocheted surface. Their defined edges make them suitable for joining into a checked arrangement.
The original designer uses UK crochet terminology throughout the project.
Step 1: Crochet the Solid Granny Squares
The central section consists of 56 solid granny squares, distributed across the three colors.
| Yarn color | Number of squares |
|---|---|
| Dark blue | 16 |
| Cream or off-white | 12 |
| Light blue | 28 |
| Total | 56 |
Each square in the original project is worked over four rounds.
Keeping the squares consistent is important because they will eventually be assembled into a single blanket.
The designer follows a separate solid granny square tutorial rather than providing an original stitch-by-stitch pattern.
Step 2: Arrange the Squares into a Gingham Pattern
Once all 56 squares are complete, the next stage is arranging them to create the checked design.
The three colors work together to establish the gingham effect. Cream squares provide the lightest areas, light blue squares create the middle tone, and dark blue squares form the strongest contrast.
Before joining the squares, arrange them according to the layout photograph in the original tutorial.
This is an important part of the project because the final appearance depends on the position of each color.
The arrangement should create a recognizable checked design rather than a random patchwork pattern.
Step 3: Join the Granny Squares
After arranging the squares, they are sewn together to form the main body of the blanket.
The original designer uses the mattress stitch joining technique.
Mattress stitch is a sewing method that can connect crocheted pieces with a relatively discreet seam. It is particularly useful when assembling individual motifs into a larger project.
The designer refers readers to a tutorial from My Crochetory for the joining process.
When assembling the blanket, pay attention to the placement of neighboring squares so the planned gingham arrangement remains intact.
Once the squares are joined, the main checked section is ready for its decorative edging.
Adding a Decorative Border to the Crochet Baby Blanket
The border is one of the distinctive features of this project.
Instead of finishing the blanket with a single plain-colored edge, the original designer experiments with ways to introduce a smaller checked pattern around the larger gingham squares.
The final border combines tapestry-style colorwork with simpler finishing rounds.
Exploring a Checked Border
The designer initially considered using a corner-to-corner (C2C) crochet technique in two colors.
However, the sample produced an appearance closer to diagonal stripes than the intended checks. It also created numerous yarn ends that would require finishing.
The designer therefore explored a tapestry crochet approach.
Tapestry crochet allows two colors to be used within the same section of fabric. The inactive strand is carried inside the stitches while the working color creates the visible design.
This method makes it possible to create smaller color changes without cutting the yarn at every transition.
Creating the Tapestry Crochet Edging
The original edging uses four rounds of checked tapestry-style crochet.
The designer works with alternating color combinations:
| Border round | Colors used |
|---|---|
| Round 1 | Light blue and dark blue |
| Round 2 | Light blue and cream |
| Round 3 | Light blue and dark blue |
| Round 4 | Light blue and cream |
The first round changes color every three stitches, establishing the smaller checked appearance.
The edging uses UK treble crochet stitches, with additional stitches and a chain space at the corners.
Because the designer did not calculate a complete stitch count for the entire perimeter, the checked pattern does not align identically at every corner.
Instead, the color transitions were adjusted visually to produce a pleasing finish.
Finishing the Outer Edge
After completing the four checked rounds, the designer adds two more rounds using light blue yarn.
These final rounds are worked in UK half treble crochet stitches.
The simpler outer edge provides a visual contrast to the busier checked section and creates a more unified finish.
The completed blanket therefore combines three different visual elements: larger solid granny squares, a smaller checked border, and a plain-colored outer edge.
Adjusting the Blanket Size and Design
One appealing feature of a granny square blanket is the possibility of changing its dimensions.
The original design uses 56 squares, but the designer explains that the blanket can be made larger or smaller.
Possible adjustments include increasing the size of the individual squares, changing the number of squares, or modifying the width of the border.
Adding another row of squares can also change the overall proportions of the blanket.
However, these adjustments should be planned before beginning the project.
A larger blanket will require more yarn, and changing the square arrangement may also require reconsidering the distribution of the three colors.
The original yarn quantities and finished measurements apply to the designer’s version rather than every possible variation.
A Handmade Blanket with a Classic Checked Finish
This gingham crochet baby blanket brings together several familiar crochet techniques in one coordinated project.
The solid granny squares provide the foundation, the three-color arrangement creates the gingham effect, and the tapestry-style edging introduces a second, smaller checked detail.
The result is a blanket with a traditional appearance that can be adapted through color choices and overall dimensions.
For crocheters who enjoy working with individual motifs, the project offers a way to create a larger finished piece from manageable sections.
The original designer made the blanket as a gift for a new baby, and it later appeared in the family’s birth announcement photographs.
Whether created in blue and cream or another carefully chosen palette, this crochet baby blanket offers a charming example of how simple square motifs can become a cohesive gingham design.
Conclusion: A Charming Handmade Crochet Baby Blanket
Creating a crochet baby blanket with a gingham design is a rewarding way to combine traditional crochet techniques with a timeless checked pattern. The combination of solid granny squares, carefully arranged colors, and a decorative border gives this project a distinctive handmade finish.
The three-color design offers plenty of creative possibilities while maintaining the classic gingham appearance. Whether you prefer soft pastels or stronger contrasting shades, the same construction concept can inspire a personalized blanket.
Working with individual squares also makes the project manageable, allowing you to complete smaller sections before joining everything together.
Frequently Asked Questions About the Crochet Baby Blanket
Is This Gingham Crochet Baby Blanket Suitable for Beginners?
This project may be approachable for crocheters who are already comfortable making granny squares and working basic crochet stitches. The individual squares provide a manageable starting point, but joining the pieces and creating the checked tapestry-style border require additional attention.
Beginners may find it helpful to practice making consistent solid granny squares before starting the complete blanket.
Can I Use Different Colors for the Gingham Pattern?
Yes. The original design uses cream, light blue, and dark blue, but other coordinating shades can create a similar checked effect.
For the most recognizable gingham appearance, choose a neutral light color alongside two contrasting shades from the same color family. Pink, sage green, lavender, or beige combinations can work beautifully.
How Are the Granny Squares Joined Together?
The original designer uses the mattress stitch technique to sew the completed solid granny squares together.
This joining method helps create relatively discreet seams between the squares. Before sewing, arrange all the pieces according to the gingham layout so the colors remain in their intended positions.
The original tutorial includes a reference to additional mattress stitch instructions.
Can I Make the Gingham Crochet Baby Blanket Larger or Smaller?
Yes. The blanket’s dimensions can be adjusted by changing the number of granny squares, increasing their size, or modifying the border.
However, changing the dimensions will affect the amount of yarn needed and may require adjustments to the color arrangement.
Planning the gingham layout before beginning will help maintain a balanced checked design throughout the finished blanket.