Crochet Teddy: Make a Soft and Adorable Handmade Bear
A handmade Crochet Teddy is a lovely project for anyone who enjoys creating stuffed animals with a soft, comforting feel. While traditional amigurumi toys often have firm shapes and tightly packed stuffing, a cuddly teddy bear can be made with a more flexible body, plush yarn, and gentle shaping.
One particularly appealing approach combines Stephanie’s Boucle Bear design from All About Ami with the soft texture of Lion Brand Homespun yarn. This combination was featured in a project review by Katie Gets Creative, where the maker adapted the original design to create a floppy, huggable bear for her daughter.
The result is a small, textured teddy bear with a classic appearance, simple facial details, and a relaxed shape that makes it especially appealing as a handmade gift.
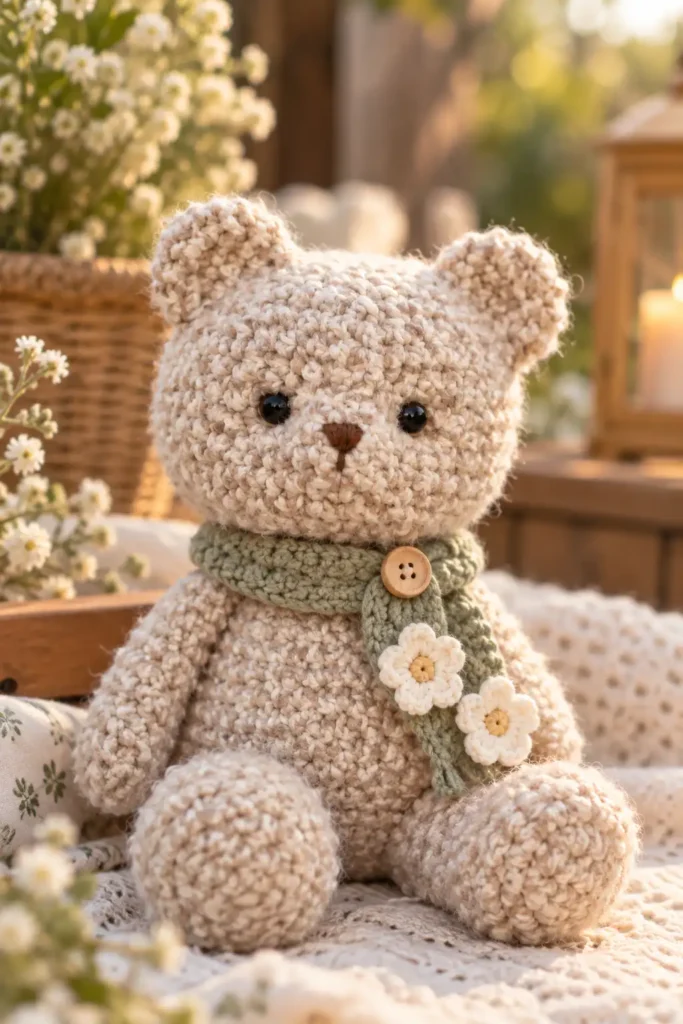
Table of Contents
Choosing the Right Crochet Teddy Pattern
The foundation of this project is the Boucle Bear pattern designed by Stephanie of All About Ami.
The original pattern provides the structure for a traditional crocheted teddy bear, including a rounded head, separate ears, shaped body, and attached arms. Rather than following every decorative shaping detail, Katie chose to simplify certain features to achieve a softer finished toy.
Her inspiration also came from a floppy crocheted bunny design. She wanted to combine the relaxed feel of that stuffed animal with the recognizable shape of Stephanie’s bear.
An important part of this adaptation was the yarn selection.
The original boucle yarn used by the designer was unavailable to Katie, so she worked with Lion Brand Homespun yarn already in her collection. Its textured surface helped give the bear a fluffy appearance without requiring complicated stitches.
How This Crochet Teddy Is Constructed
The bear uses traditional amigurumi construction, with individual pieces crocheted and assembled into a complete stuffed animal.
The design is worked in continuous spiral rounds rather than joined rounds. Its main stitch techniques are single crochet, increases, and decreases.
The terminology used here follows US crochet conventions.
Creating the Head and Facial Features
Construction begins with the teddy bear’s head.
As the head takes shape, stuffing is added and the facial details are positioned. The eyes and nose are important features because they help establish the bear’s expression.
The project uses 12 mm safety eyes and embroidery floss for the nose.
The original pattern includes additional shaping techniques to define parts of the face and head. However, Katie simplified most of these details, keeping the shaping around the eyes and nose.
This approach maintains the bear’s recognizable expression while allowing the finished head to retain a softer appearance.
Attaching the Ears and Building the Body
After completing the head, the ears are crocheted and attached.
The legs are made separately before being joined to form the lower portion of the body. From there, the body is worked upward as a connected piece.
Stuffing is added during construction to give the bear its shape.
For a softer toy, the amount of stuffing matters. The body should have enough filling to maintain its form without becoming excessively firm.
Once the body is finished, the head is sewn into place.
Finishing the Arms
The arms are completed separately and attached after the main body has been assembled.
In Katie’s version, the arms are left unstuffed. This allows them to remain flexible rather than stiff.
Combined with the soft yarn and lightly stuffed body, these unfilled arms contribute to the floppy character of the finished teddy bear.
Finished Teddy Bear Size
Katie reports that her completed bear measures approximately 9 inches (23 cm) from the top of the head to the feet.
This measurement applies to her version of the project rather than every bear made from the pattern.
The final dimensions can change depending on the yarn weight, hook size, and individual crochet tension.
Materials and Tools for the Crochet Teddy
The following materials were used in Katie’s version of the teddy bear.
| Material | Project details |
|---|---|
| Yarn | Lion Brand Homespun |
| Yarn weight | #5 Bulky |
| Yarn color | 412 Pearls |
| Crochet hook | G/6, 4.5 mm |
| Eyes | 12 mm safety eyes |
| Nose | Embroidery floss |
| Pattern | Boucle Bear by All About Ami |
| Stuffing | Soft toy filling |
Katie also mentions Poly-Fil Ultra Plush as her preferred stuffing for creating soft stuffed animals.
The combination of bulky textured yarn and a 4.5 mm hook gives this particular bear its distinctive fabric.
Because textured yarn can make individual stitches difficult to see, this project benefits from some previous experience with crocheted stuffed toys.
Adding a Simple Scarf
Katie personalized her finished bear with a small crocheted scarf.
She used a washcloth stitch pattern from her own collection, worked two rows, fastened off, and added fringe to the ends.
The scarf gives the teddy bear an additional handmade detail without changing the construction of the original toy.
The complete scarf stitch instructions are not included in the review, but the project demonstrates how a small accessory can complement a finished amigurumi animal.
Helpful Advice for Crocheting a Soft Teddy Bear
Textured yarn creates a different experience from working with smooth cotton or acrylic.
Although the basic crochet techniques remain the same, the surface of the yarn can make stitch placement more challenging.
Katie highlights several considerations that are particularly useful when making stuffed animals with fluffy fibers.
How Long Does It Take to Make a Teddy Bear?
According to Katie’s experience, this teddy bear can be completed and assembled in less than two days.
She finished her project over several crocheting sessions, taking breaks when her wrist became tired.
An experienced crocheter who is familiar with amigurumi construction may be able to complete a similar bear in a single day.
However, the actual time depends on individual speed, familiarity with the techniques, and whether all the necessary materials are available.
How Can You Make a Fluffy Crochet Bear?
The choice of yarn has a significant effect on the softness of a crocheted teddy bear.
Katie recommends considering yarns with a lofty or plush texture, including:
- Homespun yarn
- Boucle yarn
- Chenille yarn
- Faux fur yarn
These yarn types can create a soft surface that feels different from the firmer fabric commonly associated with traditional amigurumi.
Hook selection also affects the finished texture. Depending on the yarn, a larger hook may help prevent the fabric from becoming excessively stiff.
Stuffing is equally important.
Adding too much filling can make the bear feel rigid, while a more moderate amount allows the body to remain squeezable.
Katie particularly favors soft, high-quality filling for this type of project.
Other Yarn Options Worth Considering
Although Lion Brand Homespun was used for the reviewed teddy bear, Katie identifies several other yarns that she considers suitable for a similar project.
| Yarn | Weight or characteristic noted in the review |
|---|---|
| Lion Brand Go For Faux | Super bulky |
| Sirdar Snuggly Bouclette | Worsted weight |
| Yarn Bee Fleece Light | Bulky |
| Yarn Bee Luciana Yarn | Bulky |
| Premier Parfait Chunky | Plush texture |
These are suggested alternatives, not yarns Katie reports testing in this specific bear.
Changing the yarn may alter the toy’s dimensions, stitch definition, and overall appearance.
A different hook size may also be necessary to suit the chosen yarn and achieve an appropriate fabric for stuffing.
Working Successfully With Fluffy Yarn
One of the biggest challenges of fluffy yarn is identifying individual stitches.
With smooth yarn, the loops are usually easy to see. With boucle, chenille, or other highly textured fibers, those loops may be partially hidden.
Katie recommends gaining experience with smooth yarn before attempting a fluffy amigurumi project.
Once comfortable with basic stuffed-animal construction, crocheters can begin developing the ability to locate stitches by touch.
A stitch marker is especially helpful when working continuous rounds. Marking the first stitch makes it easier to identify the beginning of each round, even when the yarn obscures the stitch structure.
Katie sometimes marks the final stitch as well.
A row counter can also help track progress through the pattern.
These small organizational tools become particularly useful when the fabric is difficult to inspect visually.
Finding More Crochet Projects
The soft teddy bear is an example of how an existing amigurumi pattern can take on a different character through yarn selection, simplified shaping, and careful stuffing.
Katie’s review also points readers toward a floppy bunny project for additional inspiration and mentions optional bear accessories designed by All About Ami, including a sweater and a Santa hat.
For crocheters who enjoy making gifts, the project offers an opportunity to explore how different yarn textures influence the look and feel of a stuffed animal.
The original designer’s pattern includes the complete construction instructions, notes, and additional tutorial photographs. These resources are particularly useful for understanding the shaping and assembly techniques.
With the right yarn, careful assembly, and a little patience, this teddy bear design can become a soft, personalized handmade companion.
Conclusion
Creating a handmade Crochet Teddy is a rewarding way to explore the softer side of amigurumi. By combining a traditional teddy bear pattern with textured yarn, gentle stuffing, and flexible limbs, crocheters can make a charming stuffed animal with a relaxed, cuddly appearance.
Katie’s adaptation of the Boucle Bear pattern demonstrates how small adjustments can transform the feel of a finished project. Lion Brand Homespun yarn adds a fluffy texture, while simplified shaping and unstuffed arms contribute to the bear’s soft character.
Although working with textured yarn requires patience, the techniques become easier with practice. Familiarity with basic amigurumi stitches, careful stitch tracking, and thoughtful assembly can make the process more manageable.
Whether made as a thoughtful handmade gift or a personal crochet project, this teddy bear offers an enjoyable opportunity to experiment with yarn texture and toy construction.
Frequently Asked Questions About Crochet Teddy Bears
1. Is a Crochet Teddy suitable for beginners?
A crocheted teddy bear can be manageable for someone who already understands basic amigurumi techniques, including single crochet, increases, decreases, and working in continuous rounds.
However, the fluffy yarn used in this project can make stitches difficult to identify. Beginners may find it helpful to practice with smooth yarn before attempting a textured teddy bear.
Using stitch markers and keeping track of completed rounds can also make the construction process easier.
2. What type of yarn works best for a soft crochet teddy bear?
Soft, textured yarns are particularly suitable for creating a cuddly teddy bear.
Katie used Lion Brand Homespun, a bulky-weight yarn that gives the finished bear a fluffy appearance.
Other options mentioned in her review include boucle, chenille, and faux fur yarns. Each produces a different surface texture and may require adjustments to the crochet hook.
For the best results, choose a yarn that creates a soft fabric while keeping the stitches close enough to contain the stuffing.
3. How can I prevent my crochet teddy bear from becoming too stiff?
The amount of stuffing and the density of the crocheted fabric both affect the finished bear’s flexibility.
Avoid overstuffing the body and limbs if you want a softer, more relaxed appearance.
Katie’s version features unstuffed arms, allowing them to move naturally. She also emphasizes using soft filling to create a comfortable, squeezable toy.
Your hook size should produce fabric that is flexible without leaving large gaps between stitches.
4. Can I customize the teddy bear without changing the original pattern?
Yes. Small decorative changes can personalize a crocheted teddy bear without requiring major adjustments to its construction.
Katie added a simple fringed scarf to her finished bear, giving it a distinctive handmade detail.
You can also experiment with different yarn colors or accessories while following the original bear’s basic structure.
Keep in mind that changing the yarn type or weight may affect the final size and appearance. For structural details, consult the original Boucle Bear pattern.
Leave a Reply