Best Way to Learn Crochet
I learned to crochet in just a few hours and created my first Amigurumi Crochet Axolotl in that time. In this post I’ll share why I think it was the best way I could have chosen to learn to crochet.
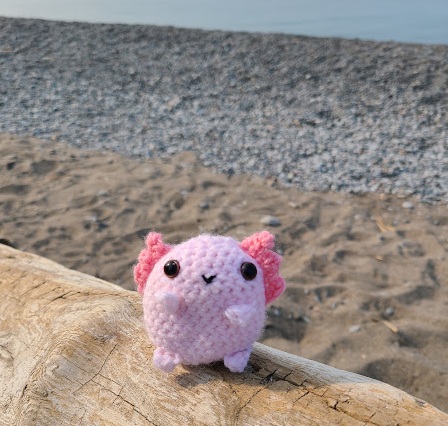
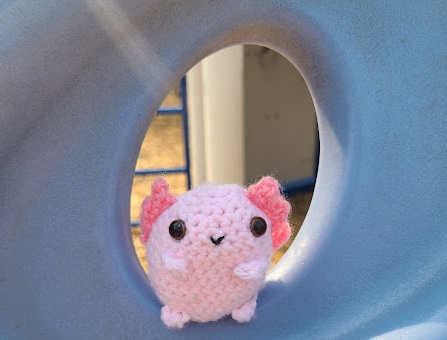
I almost can’t believe it but in that time I made this cutie pie!….
I started with ZERO idea how to crochet. None. Zip. Nil.
So I thought I’d tell you exactly what I did and how it might just be the best way to learn to crochet because it worked so quickly!
Now keep in mind this is the only way I’ve ever tried and it worked so technically it is the best way for me, as it was the only way. 🙂
In this post I’ll share with you the step by step of exactly what I did to learn to crochet.
Step 1 of Best Way to Learn Crochet: Choose a simple project
My daughter and I are focused on amigurumi crochet and our goal was to do the best amigurumi for beginners.
It took a while to find a project. First we looked on Amazon. I got a free 30-Day trial to Amazon Kindle and started loading up on Crochet books.
I found that was NOT the best way to learn to crochet because we quickly got overwhelmed by the choices and even the beginner books seemed to have a mix of easy and harder projects.
So then I decided we’d look at the library for crochet books. No luck. Since we’re into amigurumi there were NO choices. If you’re into scarves or hats then the library might be a great choice for you.
We found the best way to learn crochet was to go to Etsy and look for a simple project.
After buying a pattern we realized it’s only 2cm high! So we decided to on the fly adapt it.
I know, I know… who do I think I am to just all up and start adjusting patterns when I don’t even know boo about crochet. LOL.
I figured if we just used a bigger yarn and a needle to match it should work and make a bigger cute little axolotl amigurumi crochet cutie!
The Etsy comments also had a least one person saying they had done that, used a larger yarn to make a bigger crochet project.
Sidenote: This is a bit of a scrappy way to learn something new mainly because I’m too impatient to find a good course and take it. I did find what looks to be a good, free course on how to learn to crochet.
It might be the best way to learn crochet if you prefer detailed step by step instructions: Free course on how to learn to crochet online crochet class.
In the end it all worked out as you can see from the preview above.
Step 2: Buy the crochet materials and supplies!
It was our goal to learn to crochet fast and find the best way to learn crochet.
So we made it easy, but not necessarily cheap, by heading into Michael’s to buy all the crochet supplies and materials.
Here is the thread I started with, which we picked purely for color as that’s what was important to Ella:
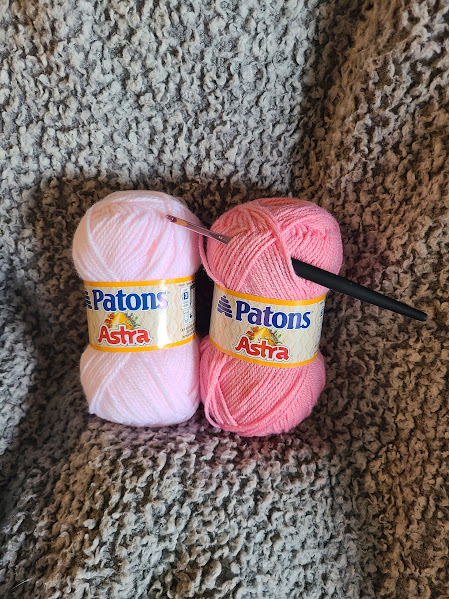
We also bought purple, white and black yarn so we can make a little amigurumi axolotl army.
Other supplies needed based on the pattern:
- Crochet Hook (bought at Michael’s size 4mm)
- Safety Eyes (bought at Michael’s)
- Marker Pins (bought at Michael’s)
- Scissors
- Tapestry/Sewing Needle – I didn’t realize this was a bigger needle than I had so this required a second trip to Michael’s
I would add we also need to get embroidery thread for the smile for the size we are making (if we followed the original pattern with a 1.1mm hook which makes a 2 cm high axolotl then maybe just sewing thread would be a good size).
Step 3: Learn how to read a crochet pattern
So… this was the hardest part and I can see how people might stall learning how to crochet because it can feel so confusing.
Starting as a complete newbie I had no idea how to read the pattern.
I figured I had chosen a pretty simple one as it LOOKED simple but I wasn’t sure.
I made the decision to learn one line at a time. So essentially I would go to YouTube for each part of the line I didn’t understand and to learn the stitch.
The stitches I needed to learn were:
- Magic Circle
- Single Crochet
- Increase Stitch
- Decrease Stitch
- Half Double Crochet Stitch
The first thing I did was go to the Artificial Intelligence tool ChatGPT to ask it about how to crochet.
This is a free tool that I often find better than google to help me learn new things.
It’s not always the best at answering so when things got confusing I decided to just get started and planned to learn and google as I go.
Step 4: Create Your Simple Crochet Project
Just start stitching!
The first part of the pattern required me to create a magic ring (or magic circle I found it’s also called) and of course I had no clue what that meana.
So I asked handy google how to crochet a magic circle and the video was perfect – easy to follow and I got my circle made.
Then according to the pattern I was to do “inc on each stitch in first round”.
Again… didn’t know what to do so went on to YouTube and searched “add increase on magic circle“.
Now from my video searches I knew enough info to get a start.
By the way the pattern I bought was the Baby Axolotl crochet pattern on Etsy.
I started this first project ever at about 6:41. In that time I did the magic circle, stitch increase, single stitch and by about 8:21 I was ready to start learning how to do a stitch decrease (making it smaller and starting to finish it up).
It was so exciting to me how quickly I learned this!
I think the big key and the best way to learn crochet is to pick something small, simple and that you can do quickly so you feel accomplished when you do!
It was sooo motivating to know in less than two hours I had made some really great progress.
By the way I had my laptop open to watch videos AS I worked on the project… so I could learn in real time.
I picked up this tip as I was watching one of the videos and that is to count your row and stitches in your head as you crochet.
For example if R1 (row 1) has 12 st ( 12 stitches) then you would count every stitch like this (saying this in your head as you stitch):
“row 1, stitch 1” , “row 1, stitch 2”, “row 1, stitch 3”, and so on…
I found this very helpful.
Also I always put the stitch marker in the first stitch of the row.
This isn’t something I read or saw in any of the videos but I could see people were using it that way. I paid $7.99 for a bag of stitch markers when I really only needed one and also you could easily use a safety pin instead which you probably have at home for free.
It’s a cute asthetic, though, and an easy to use little clip so I guess it’s fine… I’m sure the bag will last me years.
As I worked through the pattern I came across many things to learn. I just decided to learn bit by bit. The YouTube videos were a perfect help, even though they were from randomly different people. Here is a full list of the videos I looked up and the YouTube links:
- how to crochet a magic circle
- add increase on magic circle
- single crochet stitch
- How to decrease in crochet.
- How to use safety eyes in crochet.
- how to chain 2 in crochet
- hdc crochet stitch
When it started to get dark I decided to stop even though I really didn’t want to! I think I had immediately falling in love with crochet.
It was getting hard to see the stitches and you need to see them to know where to put your hook for the next stitch. I just didn’t have the lighting set up properly to keep going so I waited until the next day.
Woke up the next day and did my treadmill walk and then got setup to complete the project!
All in all my project was completed quickly for the following reasons:
- I picked a SMALL project. I think going for something big as your first project would be a mistake. It’s quite likely you’ll lose interest before you complete it and it’s critical to get that quick win.
- I picked a SIMPLE pattern. I could stress this enough to my daughter who wanted to pick the cutest pattern. I had to tell her a few times we were going simple to start.
- I just did it. Yep, just do it. I didn’t decide I had to take a course or learn a simpler stitch. I started with the magic circle and learned my way through the pattern as I went.
I started at 6:41pm on Saturday and finished at 3:35pm on Sunday.
This was truly an easy and perhaps one of the best ways to learn crochet.
It was fun.
I finished my project quickly.
I learned a good number of basic stitches.
I feel confident I can do this one again and many more to come.
I’m simply “hooked” on crochet.
I hope this has inspired you to see if crochet might “hook” you, too!
With love and crochet wishes,
Angela (& Ella)
p.s. Oh and how could I forget! Here is another picture or two of our super awesome first baby Axolotl that Ella named Strawberry. We love him: