Crochet Sweaters: A Beginner-Friendly Guide to Making a Cozy Ribbed Sweater
Crochet Sweaters are one of the most rewarding projects to make when you want to turn simple stitches into something practical, comfortable, and wearable. A handmade sweater may look complicated at first, but choosing a design with straightforward construction can make the process much easier.
The Light Sky Sweater is a useful example. The referenced design is described as beginner-friendly and combines simple crochet techniques with ribbed texture and basic garment construction. It uses slip stitches, half double crochet, single crochet, and back-loop-only work to create a textured sweater.
Rather than reproducing the original pattern row by row, this guide explains the materials, techniques, construction, and practical considerations that can help you understand how this style of crochet sweater comes together.
Table of Contents
Why Crochet Sweaters Are Worth Making
Making your own sweater gives you control over details that are difficult to customize when buying ready-made clothing. You can choose the yarn color, texture, and overall appearance while learning useful garment-making techniques.
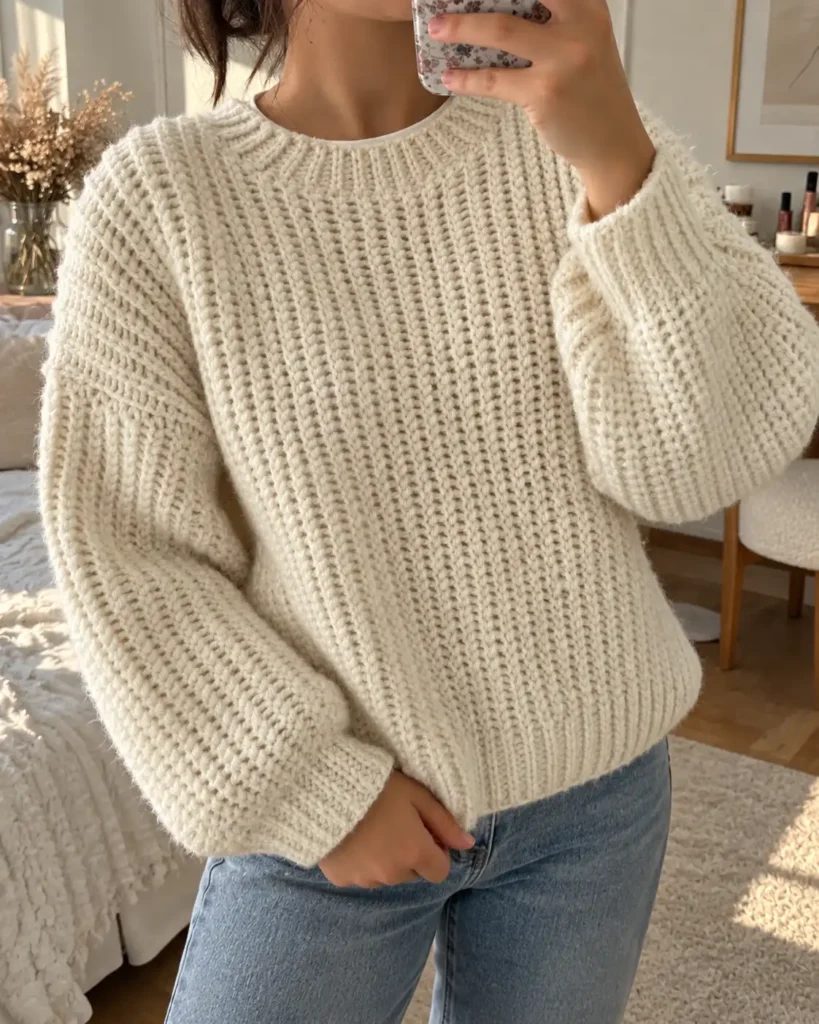
A ribbed crochet sweater is particularly interesting because relatively basic stitches can produce sophisticated texture. The Light Sky design relies heavily on slip stitches and stitches worked in the back loop only (BLO), creating visible ribbing without requiring a large collection of advanced stitches.
For beginners moving from scarves and small accessories into garments, this type of construction can also introduce several important skills: maintaining gauge, changing hook sizes, shaping a neckline, assembling panels, creating sleeves, and seaming a finished garment.
Crochet Sweater Skill Level
The referenced Light Sky Sweater is identified as Beginner Friendly and uses US crochet terminology.
That does not necessarily mean it is an ideal first-ever crochet project. You should be reasonably comfortable forming basic stitches and maintaining consistent tension before starting a garment.
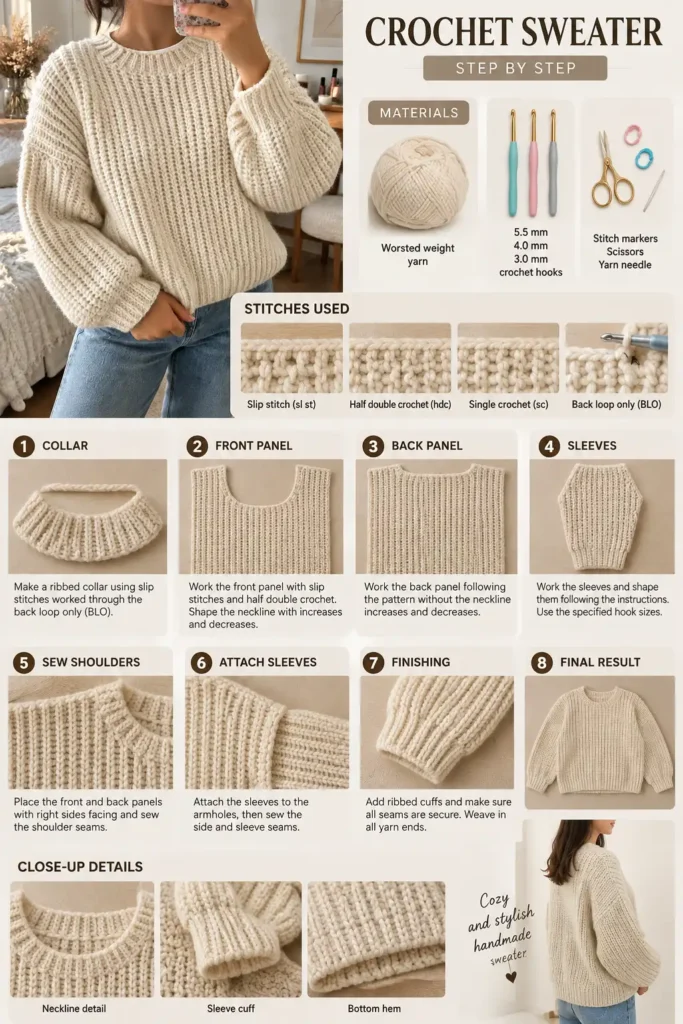
The main techniques used include:
- Sl st – slip stitch
- Hdc – half double crochet
- Sc – single crochet
- BLO – back loop only
- Sk – skip
- Rep – repeat
- Decr – decrease
- Incr – increase
- Tog – together
- RS – right side
- WS – wrong side
These abbreviations and techniques are taken from the source pattern’s stitch library.
Materials for a Ribbed Crochet Sweater
The referenced sweater uses worsted-weight yarn. The source specifically identifies Mary Maxim worsted-weight yarn and notes that the original sweater was made in a Denim color.
It also uses several hook sizes during construction:
5.5 mm crochet hook – primarily associated with the body construction.
4.0 mm crochet hook – used for sections including the bands and collar.
3.0 mm crochet hook – used when forming the sleeve band.
Other useful tools include stitch markers, scissors, and a yarn needle for finishing and seaming.
When substituting yarn, matching the yarn weight alone is not enough. Fiber composition, elasticity, twist, and personal tension can all change the finished fabric.
Understanding Gauge Before You Begin
Gauge is especially important when making Crochet Sweaters because small differences accumulate across a garment.
The referenced sweater gives a gauge of:
13 stitches × 14 rows = 4 × 4 inches.
A gauge swatch allows you to compare your crochet tension with the pattern before committing to an entire sweater.
If your swatch is significantly larger or smaller than the specified gauge, the dimensions of your finished garment can also differ. That is why checking gauge before beginning the body is much easier than discovering a sizing problem after completing several sections.
How the Crochet Sweater Is Constructed
One reason this style of sweater is approachable is that its construction can be understood as a series of separate stages.
The Light Sky design is organized around a collar, front body panel, back body panel, and sleeves. The pieces are eventually joined and seamed to form the garment.
The Collar
The collar uses slip-stitch ribbing worked through the back loop. This technique produces a flexible, textured strip.
Back-loop-only crochet means inserting the hook through only the back loop of a stitch rather than underneath both loops. Repeating this technique changes the structure of the fabric and creates pronounced ridges.
The collar is eventually closed and incorporated into the sweater construction.
Front Body Panel
The front combines slip stitches and half double crochet, with different hook sizes used for different portions of the fabric.
A stitch marker helps identify the point where the hook change occurs.
The front also includes neckline shaping. This is created through controlled decreases and increases positioned according to markers placed around the collar.
This stage requires more attention than simply repeating straight rows. Keeping the markers in position and following the shaping instructions for the selected size are important for maintaining symmetry.
Back Body Panel
The back follows the general body construction but differs from the front in an important way: the source specifies that the back does not use the increases and decreases employed for the front shaping.
After the main panels are complete, the garment is positioned with the appropriate sides facing before the side seams are sewn.
Openings are retained for the arms rather than sewing the entire sides closed.
Sleeves
The sleeves are worked from the armhole area.
The construction again combines hook sizes and back-loop-only crochet. Rows are progressively connected around the armhole before the sleeve is closed with a seam.
The process is then repeated for the second sleeve.
This method means you do not necessarily need to create two completely separate sleeves before attaching them to the sweater.
Why Back Loop Only Crochet Matters
BLO is one of the defining techniques in this design.
Normally, a crochet hook passes beneath both loops at the top of a stitch. When working BLO, you insert the hook into only the loop farther away from you.
Repeated over many rows, this creates ridges that can resemble knitted ribbing.
For Crochet Sweaters, that texture can provide visual interest while keeping the stitch repertoire relatively simple.
The technique also makes stitch identification important. Accidentally working through both loops in isolated places can interrupt the appearance of the ribbing.
Why Different Crochet Hook Sizes Are Used
Using several hook sizes within one sweater may initially seem unnecessary, but hook changes can affect the density and behavior of different sections.
The referenced project uses 5.5 mm, 4.0 mm, and 3.0 mm hooks, with the smaller hooks appearing in band or ribbing sections.
A smaller hook generally creates denser crochet when other variables remain the same. This can be useful in areas where a firmer or more compact structure is desired.
For this reason, you should not automatically complete the entire garment using one hook simply because it feels more convenient. Follow the hook assignments of the pattern you are actually making.
Choosing Yarn for Crochet Sweaters
The reference project calls for worsted-weight yarn.
When choosing an alternative, consider more than color.
A smooth yarn can make stitch definition easier to see, which is helpful when working repeated BLO sections. Fiber content can also influence warmth, drape, stretch, washing requirements, and how the sweater feels against your skin.
Before purchasing all the yarn for a garment, make a swatch whenever possible.
Check whether you like the fabric after crocheting it and whether you can achieve the required gauge.
Getting a Better Fit
Fit is one of the biggest differences between crocheting accessories and making clothing.
The referenced Light Sky Sweater information provides sizes XS through L.
Use the measurements and sizing information supplied by the specific pattern rather than choosing a size simply because it matches the label you normally buy in stores.
Your crochet tension matters too.
Two people can follow the same pattern with the same hook and yarn weight and still produce slightly different fabrics. Gauge is therefore an essential part of determining whether your finished dimensions will correspond to the designer’s intended sizing.
Common Mistakes When Making Crochet Sweaters
A few simple habits can prevent frustrating problems.
Skipping the gauge swatch is one of the biggest risks. A sweater requires considerably more work than a small accessory, so checking gauge early can save both yarn and time.
Losing track of BLO stitches can affect the ribbed appearance. Slow down when beginning a new row and identify the correct loop before continuing.
Moving stitch markers accidentally can create problems during shaping. In this sweater style, markers identify important construction points.
Ignoring hook changes can also alter the intended fabric structure.
Finally, avoid waiting until the very end to examine your work. Check the fabric, shaping, and proportions periodically so that mistakes are easier to correct.
Finishing Your Crochet Sweater
Finishing can make a significant difference to the appearance of Crochet Sweaters.
Check your seams carefully and make sure the garment is correctly oriented before permanently securing loose ends. The source construction calls for sewing to be completed from the inside or wrong side of the sweater.
Once construction is complete, weave in yarn ends securely with a yarn needle.
Any washing or blocking should follow the care recommendations for the yarn you actually used. Fiber types can react very differently to water, heat, and agitation, so avoid assuming that every crochet sweater can be treated the same way.
Styling a Handmade Crochet Sweater
A textured sweater can become an easy everyday layering piece.
Neutral shades can emphasize the structure of the stitches, while stronger colors can make the sweater itself the focus of an outfit. Pale blue or denim-inspired shades suit the Light Sky aesthetic particularly well, but choosing a color you genuinely wear often can make your finished project much more useful.
Pair the sweater with jeans for a relaxed look, layer it over a simple shirt, or combine it with a skirt or trousers for a more polished outfit.
The best part is that the finished piece carries the distinctive texture of handmade crochet.
Final Thoughts on Crochet Sweaters
Crochet Sweaters can look ambitious, but a thoughtfully constructed beginner-friendly design makes garment crochet much easier to understand.
The Light Sky style demonstrates how a relatively small collection of techniques—slip stitch, half double crochet, single crochet, BLO work, increases, decreases, seaming, and hook changes—can be combined to create a textured wearable garment.
Take time to check your gauge, keep your stitch markers organized, follow the sizing information for your chosen pattern, and pay attention to shaping. Instead of rushing toward the finished sweater, treat each panel and construction stage as its own manageable crochet project.
Leave a Reply