Crochet Winter Sweater: A Cozy and Beautiful Handmade Project
A Crochet Winter Sweater is a practical way to bring handmade comfort into your cold-weather wardrobe. With its relaxed shape, long sleeves, and simple textured fabric, this project combines everyday wearability with the satisfaction of creating your own clothing.
Designed for intermediate crocheters, this sweater is constructed from separate front, back, and sleeve panels. The pieces are joined together after crocheting, allowing you to check their proportions and make adjustments before completing the garment.
The design primarily uses double crochet stitches, with increases and decreases providing shaping. Worsted weight yarn gives the sweater a substantial feel, while contrasting ribbed details offer an opportunity to introduce a second color.
Whether you’re making a comfortable layer for yourself or a thoughtful handmade gift, this project offers room for personal touches without requiring an elaborate stitch pattern.
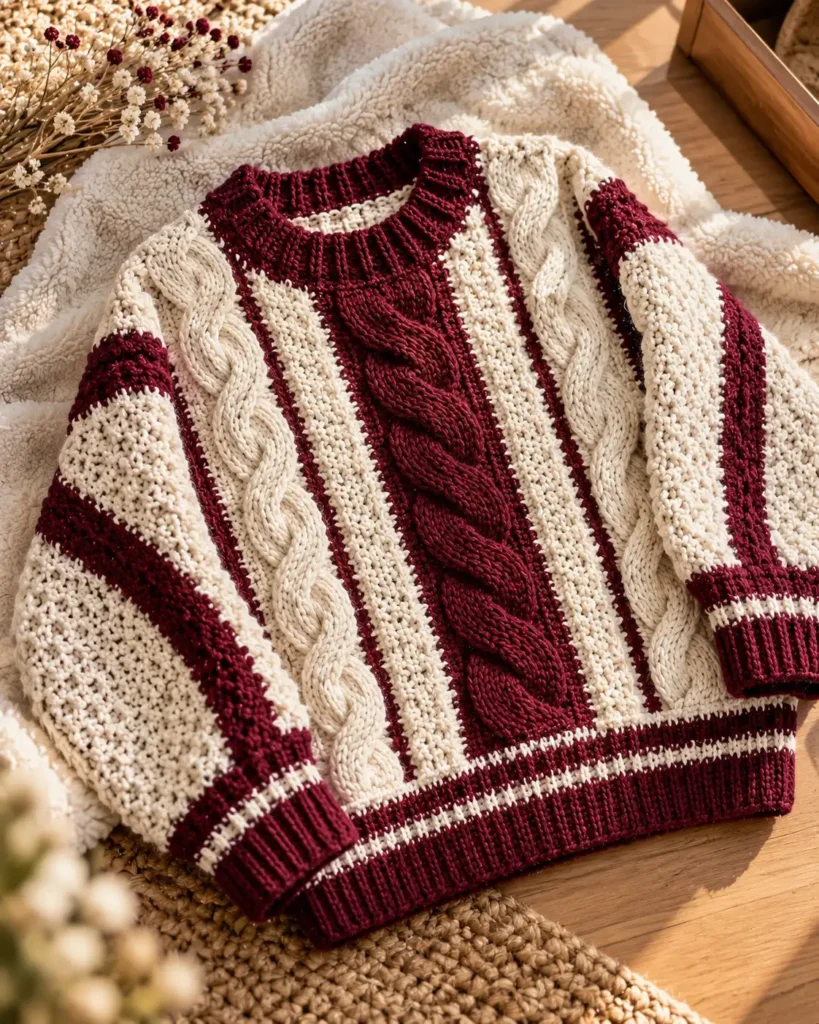
Table of Contents
Why You’ll Enjoy Making This Crochet Winter Sweater
One of the most appealing features of this design is its panel-based construction. Instead of working the entire garment as one continuous piece, you create individual sections that are assembled afterward.
This approach offers several advantages:
- Adjustable proportions: The body and sleeve lengths can be modified to better suit your preferences.
- Approachable stitchwork: Double crochet forms the main fabric, making the stitch pattern relatively straightforward for crocheters familiar with garment shaping.
- Decorative finishing: Contrasting ribbed details can add definition to the cuffs and complement the main sweater color.
- Comfortable layering: The relaxed silhouette makes the finished garment suitable for wearing over lighter tops.
- Personal color choices: You can create a neutral everyday sweater or experiment with more expressive color combinations.
The original design uses approximately 1,200 yards of worsted weight yarn. The source suggests that the project can be completed in a few days, although the actual time will depend on your experience, working pace, and any modifications.
Materials Needed for the Sweater
Gathering the appropriate materials before starting will help you maintain consistent fabric throughout the project.
| Material | Specification |
|---|---|
| Main yarn | Worsted weight yarn, category 4 |
| Contrast yarn | Worsted weight yarn for ribbed details |
| Crochet hook | 5.0 mm (US H/8) |
| Tapestry needle | For joining and securing yarn ends |
| Stitch marker | Optional, for tracking stitches or sections |
| Approximate yarn amount | 1,200 yards, as stated by the source |
Choosing a Suitable Yarn
The original article recommends worsted weight acrylic yarn because of its shape retention, ease of care, and wide availability of colors.
When selecting yarn, consider how the fiber feels against your skin and how you intend to wear the sweater. A soft acrylic yarn may be convenient for everyday use, particularly when its care instructions allow machine washing.
You can also explore different fibers, but changing the yarn composition or weight can affect the finished fabric.
The source mentions DK-weight cotton or cotton blends as possible alternatives. However, these yarns may produce a different drape, thickness, and garment size. Any substitution should be evaluated with a gauge swatch rather than assumed to work with the original measurements.
Crochet Hook and Accessories
The recommended 5.0 mm hook is intended for use with the pattern’s worsted weight yarn.
A tapestry needle is needed for securing yarn tails and can also assist with seaming. Stitch markers are optional but useful for identifying shaping points and keeping track of your progress.
Crochet Abbreviations and Pattern Details
The original pattern uses US crochet terminology.
| Abbreviation | Meaning |
|---|---|
| ch | Chain |
| dc | Double crochet |
| inc | Increase, working two double crochet stitches into one stitch |
| dec | Decrease, working two double crochet stitches together |
| sl st | Slip stitch |
| st | Stitch |
| sts | Stitches |
Familiarity with these techniques is important because the garment includes shaped sections rather than relying entirely on straight rows.
Skill Level and Finished Measurements
The pattern is classified as intermediate.
Its published finished dimensions are approximately:
- Bust circumference: 100 cm (39 inches)
- Body length: 60 cm (24 inches)
- Sleeves: Long sleeves, with no finished sleeve measurement specified
These dimensions describe the intended finished garment rather than a complete size chart.
The original pattern does not provide a numerical gauge. For that reason, it is particularly important to check the dimensions of your crocheted panels before joining them. The listed measurements should not be treated as guaranteed results for every crocheter.
Understanding the Sweater Construction
The Crochet Winter Sweater is made from four primary pieces: a front panel, a back panel, and two sleeves.
Double crochet stitches form the main fabric, while increases and decreases introduce shaping. Once the individual pieces are finished, they are connected to create the sweater.
The following overview explains the construction without replacing the original pattern’s detailed stitch instructions.
Creating the Front Panel
The front begins with a foundation chain and develops through rows of double crochet.
Increases are introduced during the early shaping sections, followed by rows that maintain the established width. Later decreases bring the fabric back toward a narrower stitch count.
Because this section contributes to the overall fit of the garment, it is helpful to check its width and length as you work.
Pay particular attention to the shaping rows. Missing an increase or decrease can affect how the front panel aligns with the back.
Working the Back Panel
The back follows the same general construction approach as the front.
Both panels use double crochet fabric with increases, straight sections, and decreases.
Keeping your tension consistent between the two pieces is important. Even when the stitch counts match, differences in stitch height or tension can create panels with slightly different measurements.
Before assembly, place the front and back pieces together and compare their edges.
Making Both Sleeves
The sweater requires two separately crocheted sleeves.
Each sleeve begins with a foundation chain and incorporates shaping through increases and decreases. Straight double crochet sections connect these shaping areas.
After completing the first sleeve, use its measurements as a reference while making the second.
This is also a useful stage to consider whether the sleeve length suits your preference. Changes should be planned carefully so that both sleeves remain symmetrical and fit the body openings.
Joining the Sweater Pieces
Assembly transforms the individual panels into a wearable garment.
The original instructions describe connecting the front and back at the shoulders with slip stitches, attaching the sleeves, and completing the side seams with slip stitches or whip stitch.
Before sewing or crocheting the seams permanently, align the pieces and check that the corresponding edges meet evenly.
Avoid pulling the joining yarn excessively tight, since rigid seams can reduce the comfort and flexibility of the garment.
Helpful Tips for a Neater Finished Sweater
Garment projects benefit from careful attention to consistency, particularly when several pieces must fit together.
Maintain Even Stitch Tension
Try to keep your stitches uniform throughout the project.
Uneven tension can change the dimensions of a panel, even when every row contains the correct number of stitches.
If you notice that one section looks noticeably tighter or looser than another, check your working tension before continuing.
Check Your Stitch Counts
Counting stitches is especially useful after increases and decreases.
A small counting error may not be obvious immediately, but it can affect the width of a panel and make assembly more difficult.
Use stitch markers where helpful, and compare the actual stitch count with the original instructions at each shaping stage.
Check the Fit Before Assembly
Because the sweater is constructed in pieces, you have an opportunity to compare the sections before joining them.
Lay the panels flat and examine their lengths, widths, and overall symmetry.
If you intend to adjust the body length, make sure corresponding changes are reflected in both the front and back.
Secure the Yarn Ends Carefully
Loose ends can become visible or work free with repeated wear.
Use a tapestry needle to weave yarn tails securely through the surrounding stitches, taking care not to distort the fabric.
This finishing step helps give the sweater a cleaner appearance.
Creative Ways to Personalize Your Sweater
The original design provides several opportunities for customization, particularly through color, yarn selection, length, and texture.
Experiment With Different Colors
A single main color with contrasting cuffs can create a clean, understated look.
For a more distinctive garment, consider combining complementary or contrasting shades.
The original article suggests experimenting with brighter color palettes, allowing the sweater to become a more prominent part of an outfit.
Adjust the Body or Sleeve Length
Adding or removing rows can change the proportions of the garment.
A longer body may offer additional coverage, while shorter sleeves can produce a different silhouette.
Keep in mind that length adjustments do not automatically change the bust circumference or sleeve width. More extensive resizing requires careful attention to the shaping and final measurements.
Explore Alternative Yarn Weights
The source discusses two alternative approaches:
- A heavier yarn paired with a 6.0 mm (US J/10) hook for a more substantial fabric.
- DK-weight yarn paired with a 4.0 mm (US G/6) hook for a lighter seasonal variation.
These are suggested adaptations rather than fully specified alternative patterns.
Changing yarn weight and hook size can significantly affect gauge, fabric density, and finished measurements. Make a sample swatch and reassess the garment dimensions before committing to either variation.
Introduce Additional Texture
Front post and back post double crochet stitches are suggested as possible ways to add texture.
These techniques create raised stitch details that can bring more definition to selected areas of the fabric.
However, incorporating them into the main panels may change the fabric’s stretch and dimensions. Test any textured variation before applying it throughout the sweater.
Styling Your Finished Sweater
The completed garment can be worn in several ways.
Pair it with jeans for a casual winter outfit, or layer it over a lightweight shirt or turtleneck when extra warmth is needed.
Its handmade character also makes it a thoughtful gift, particularly when the color and fit are chosen with the recipient in mind.
Finishing, Blocking, and Caring for Your Sweater
Proper finishing and care can help preserve the sweater’s appearance and shape.
Weaving in Loose Ends
After completing the seams, inspect the sweater for remaining yarn tails.
Thread each tail through a tapestry needle and work it discreetly into the surrounding stitches.
The source recommends weaving the yarn back and forth through a short section of matching fabric before trimming the excess.
Check that the ends are secure without pulling the stitches out of alignment.
Blocking the Finished Garment
The original article describes blocking as optional for this project.
If the panels appear uneven, gentle blocking may help improve their appearance and alignment.
Lay the sweater flat and arrange it to the desired dimensions. Any use of moisture, heat, or steam should be compatible with the yarn manufacturer’s instructions.
Take particular care with acrylic fibers, since excessive heat can permanently alter the fabric.
Washing and Storage
Always follow the care information supplied with your chosen yarn.
The original article suggests cold, gentle machine washing where appropriate, followed by flat drying to help maintain the garment’s shape.
Avoid hanging a heavy wet sweater, as the weight of the water may stretch the fabric.
When the sweater is completely dry, fold it and store it in a clean, dry location.
Frequently Asked Questions
Can I Make the Crochet Winter Sweater Larger?
Yes, but the type of adjustment matters.
Adding rows can increase the body or sleeve length, while increasing the garment’s circumference requires changes to the stitch counts and shaping.
Because the source provides only one set of finished measurements and no detailed grading instructions, substantial resizing will require additional planning.
What Should I Do if My Gauge Is Different?
The original pattern does not specify a numerical gauge.
Start by making a swatch using your chosen yarn and hook, then examine the fabric’s dimensions, flexibility, and stitch consistency.
You can experiment with a different hook size if the fabric is too tight or loose, but be aware that this will also affect the finished measurements.
Checking panel dimensions throughout the project is especially important.
Can I Use a Different Yarn?
Yes. Another worsted weight yarn may be a reasonable starting point, provided its characteristics are suitable for the garment.
Fiber content, thickness, elasticity, and stitch definition can all influence the result.
If you choose a different yarn weight, expect to reassess the gauge and potentially adjust the construction.
Is This Sweater Suitable for Beginners?
The pattern is identified as intermediate.
Crocheters who already understand double crochet, increases, decreases, and basic seaming will be better prepared to follow it.
A confident beginner familiar with these skills may find the construction approachable, but garment sizing and shaping require more attention than a simple rectangular crochet project.
Can I Adapt This Pattern for a Child?
The published measurements are intended for an adult-sized sweater.
A child-sized version would require more than simply shortening the body and sleeves. The neckline, shoulders, chest width, and arm openings would also need to be proportioned appropriately.
The source does not provide a dedicated child-size pattern, so a reliable child-specific garment pattern may be a better option.
Final Thoughts
Making a Crochet Winter Sweater is an opportunity to explore garment construction while creating something useful for the colder months.
The separate panels make it possible to focus on one section at a time, while the double crochet fabric and shaped sleeves introduce practical techniques for developing your garment-making skills.
Careful stitch counting, consistent tension, and thoughtful assembly will make a meaningful difference to the finished result.
With your preferred colors and a little attention to fit, this sweater can become a comfortable handmade addition to your winter wardrobe, ready to wear, layer, and enjoy throughout the season.
Leave a Reply