Crochet Sweater: A Beautiful and Comfortable Handmade Pullover
A handmade Crochet Sweater brings together everyday comfort, practical construction, and the satisfaction of creating a wearable garment from yarn. This long-sleeved pullover features a straightforward design built from separate crocheted pieces, making it an appealing project for intermediate crocheters who want to develop their garment-making skills.
The sweater uses worsted-weight yarn and half double crochet stitches to create a textured fabric. Its rectangular front and back panels simplify the construction process, while the adjustable length and allowance for ease offer opportunities to personalize the fit.
With a 5.5 mm crochet hook and a few essential supplies, you can create a versatile pullover suitable for casual outfits, layering, or gifting.
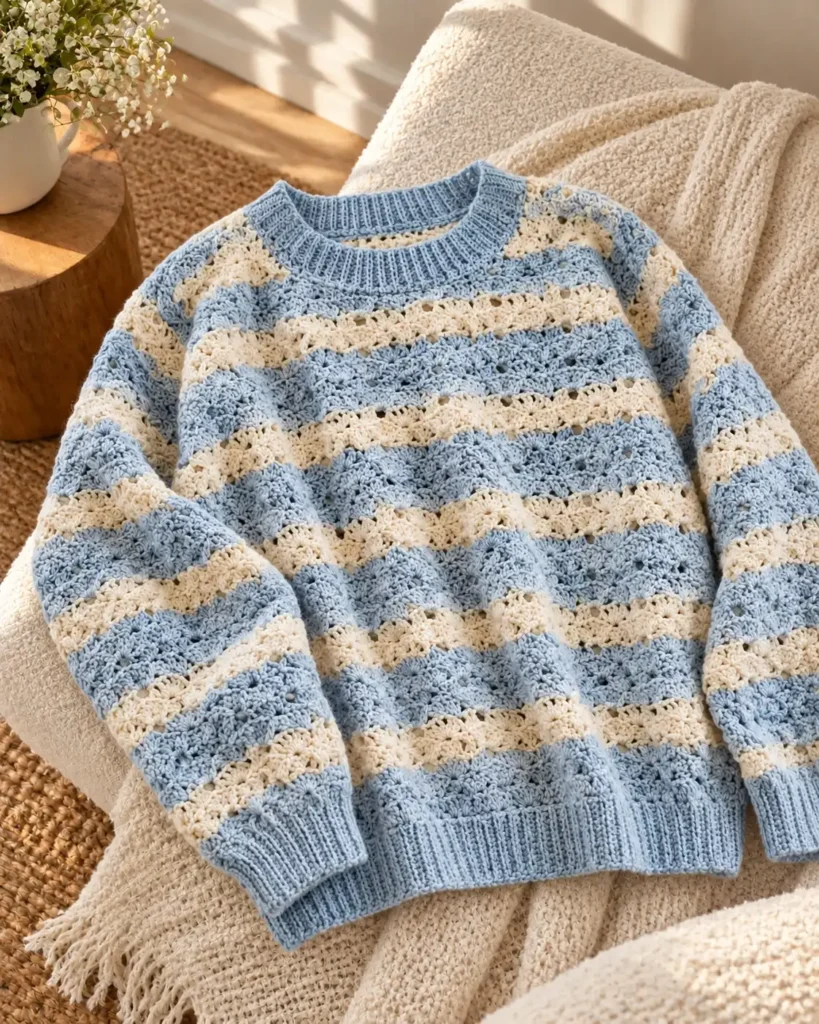
Table of Contents
What Makes This Crochet Sweater Worth Making?
This design focuses on uncomplicated shapes rather than elaborate shaping techniques. Instead of constructing the garment as one continuous piece, the sweater is assembled from individual panels and sleeves.
Several features make the project particularly appealing:
- Straightforward construction: The front and back are rectangular pieces, allowing crocheters to concentrate on maintaining consistent stitches and dimensions.
- Adjustable fit: The design accommodates additional ease around the bust, giving makers some flexibility when planning their preferred fit.
- Textured fabric: Half double crochet stitches create a relatively dense, comfortable fabric with a recognizable handmade appearance.
- Versatile styling: The finished pullover can be worn on its own or layered with other clothing.
- Personalization options: Different colors, yarn compositions, and garment lengths can change the appearance of the sweater.
Although the construction is relatively simple, assembling the pieces neatly and maintaining consistent tension require attention. These details make the project appropriate for crocheters with some previous experience.
Materials Needed for the Crochet Sweater
The original design uses a short list of standard crochet supplies.
| Material | Specification |
|---|---|
| Yarn | Worsted weight (category 4) |
| Suggested fiber | Acrylic |
| Yarn quantity | Source lists less than two balls |
| Crochet hook | 5.5 mm (US I/9) |
| Tapestry needle | For joining pieces and weaving in ends |
| Scissors | For trimming yarn |
The yarn quantity is reported as stated in the original pattern. Because the weight and yardage of each ball are not specified, this amount should not be treated as a universal requirement for every yarn brand or sweater size.
Choosing a Suitable Yarn
Worsted-weight acrylic yarn is the primary recommendation in the reference design. Acrylic is commonly selected for everyday garments because it is available in many colors and is often easy to maintain.
The pattern also discusses cotton and cotton-blend alternatives. These fibers can produce a different fabric texture and drape.
Acrylic generally offers more elasticity than many cotton yarns, while cotton can create a firmer, more structured result. The exact behavior depends on the particular yarn.
Changing yarn weight or fiber composition may affect the sweater’s finished dimensions. A substitute should therefore be evaluated carefully rather than assumed to produce the same fit.
Crochet Abbreviations and Stitch Terminology
The original pattern uses US crochet terminology.
| Abbreviation | Meaning |
|---|---|
| ch | Chain |
| hdc | Half double crochet |
| sl st | Slip stitch |
| st | Stitch |
Half double crochet is the principal stitch used throughout the garment.
This stitch creates a fabric with moderate height and visible texture. Its consistent structure is particularly useful when making flat panels that must align during assembly.
Understanding these abbreviations before beginning will make the original instructions easier to follow.
Understanding the Sweater’s Construction
The pullover is assembled from four main crocheted pieces: a front panel, a back panel, and two sleeves.
The original design identifies an approximate finished bust measurement of 90 cm (35 inches), with an adjustable garment length.
It also describes panel-width measurements that do not clearly reconcile with the stated finished bust circumference. For this reason, the dimensions should be checked against the intended fit before committing to the full garment.
The reference does not provide a numerical stitch gauge, so an exact relationship between stitch counts and finished measurements cannot be independently established.
Front Panel
The front of the sweater is made as a rectangular piece worked from the lower edge upward.
Rows of half double crochet form the main fabric, producing an even surface that can be joined to the back panel.
The source describes a body-panel length of approximately 55 cm (22 inches) before its additional upper rows.
Maintaining a consistent width is important because irregular edges can make the final seams difficult to align.
Back Panel
The back follows the same general construction as the front.
Matching the two panels helps create a balanced garment, especially at the shoulder and side seams.
Both pieces should be compared before assembly to identify any noticeable differences in width or length.
The source describes additional rows near the upper edges as producing a ribbed appearance, although it does not specify a separate ribbing stitch technique.
Sleeves
Two sleeves complete the pullover.
Like the body panels, they are crocheted from the bottom upward using half double crochet stitches.
The reference describes a sleeve length of approximately 40 cm (15.75 inches) before the additional finishing rows.
The sleeves are subsequently attached to the openings left in the body.
Because the source does not describe detailed sleeve shaping, crocheters should pay particular attention to how the sleeve edges fit the armholes.
Joining the Pieces
Assembly turns the individual crocheted sections into a wearable sweater.
The body panels are joined along their sides, with openings reserved for the sleeves. The construction notes also identify shoulder seams as part of the assembly.
Each sleeve is then positioned at its corresponding armhole and sewn into place.
Before stitching the pieces together permanently, arranging them on a flat surface can help reveal differences in dimensions or alignment.
Practical Tips for a Neater Finished Sweater
Maintain Consistent Tension
Tension influences the width, length, and appearance of crocheted fabric.
Because this sweater consists of separate pieces, differences in tension may become noticeable when the panels are placed together.
Try to maintain a similar crocheting rhythm throughout the project and compare corresponding sections regularly.
Monitor Stitch Counts
Keeping track of stitches helps prevent unintended changes in panel width.
Stitch markers can help identify important positions or make it easier to monitor progress across longer rows.
Checking the edges periodically is especially useful when working repetitive half double crochet sections.
Check the Fit Before Sewing
The sweater’s rectangular construction allows some flexibility, but the finished fit still depends on the dimensions of the individual pieces.
The reference emphasizes allowing sufficient ease around the bust.
Before assembly, compare the pieces with the intended garment measurements and confirm that the sleeve openings are appropriately positioned.
Finish Yarn Ends Carefully
Loose yarn tails can make an otherwise tidy sweater appear unfinished.
A tapestry needle allows the ends to be worked discreetly into the wrong side of the fabric.
Taking time with this final stage can improve the overall appearance of the garment.
Ways to Customize the Design
The sweater’s simple silhouette provides a foundation for several creative variations.
Experiment with Color
An ombré yarn can introduce gradual color changes without requiring a different construction method.
Alternatively, a solid shade highlights the repeated stitch texture and creates a more understated appearance.
Adjust the Garment Size
The original pattern suggests increasing the foundation width when making a larger sweater.
However, resizing a garment involves more than changing one dimension. The relationship between the body panels, shoulders, and sleeves should also be considered.
Because no numerical gauge or comprehensive grading information is supplied, larger sizes cannot be calculated reliably from the published specifications alone.
Explore Seasonal Yarn Choices
A worsted-weight cotton yarn may produce a different feel from acrylic and can be considered for a lighter seasonal version.
The source also proposes bulky yarn with a 6.5 mm (US K/10.5) hook for a thicker winter garment.
Such a change would alter the fabric and potentially the finished size, so it should be treated as an adaptation rather than an identical substitute.
Wear or Gift the Finished Pullover
The completed sweater can serve as casual everyday clothing, a comfortable layering piece, or a handmade present.
Its appearance can be adapted to the recipient through yarn color, garment length, and preferred ease.
Finishing, Blocking, and Caring for Your Sweater
Weaving in Loose Ends
After joining the garment, use a tapestry needle to secure the remaining yarn tails on the wrong side.
Work the ends through nearby stitches so they are less visible from the outside.
Trim the excess only after the tails are adequately secured.
Blocking the Finished Garment
The original source states that blocking is not essential for its acrylic version.
It also suggests that gentle steaming may improve the fabric’s drape.
Acrylic is sensitive to excessive heat, so any steaming should be approached cautiously and in accordance with the yarn manufacturer’s recommendations.
Washing and Storage
Care instructions depend on the yarn used.
The reference recommends checking the yarn label and generally suggests a gentle cold-water wash followed by drying flat.
Storing the sweater folded rather than hanging it may help reduce stretching over time.
These practices are particularly relevant for crocheted garments, whose weight can place tension on stitches during storage.
Frequently Asked Questions
Can I make this crochet sweater in a larger size?
The original design allows for adjustments to the body width by changing the foundation length. However, the source does not provide complete sizing calculations for additional sizes.
Check the intended bust circumference, ease, and corresponding sleeve dimensions before making alterations.
What should I do if my gauge is different?
A larger crochet hook generally produces looser stitches, while a smaller hook generally produces tighter stitches.
Although the original article discusses adjusting hook size, it does not supply a numerical gauge target. Therefore, makers should assess their own fabric measurements and drape rather than attempt to match an unspecified gauge.
Can I replace acrylic yarn with another fiber?
Yes. The source discusses cotton, cotton blends, and bamboo blends as possible alternatives.
However, these materials can differ in elasticity, thickness, weight, and drape. Using the same stitch counts with a different yarn does not guarantee identical measurements.
Does this pattern require a magic ring?
No magic ring is described in the sweater construction. The garment is made from flat panels and sleeves rather than pieces worked outward from a central ring.
Is this sweater suitable for babies?
The reference presents this pullover primarily as a garment for older children and adults.
It does not provide baby sizing or a baby-specific version. A suitable infant garment would require appropriately designed dimensions and attention to age-related clothing safety.
Final Thoughts
This Crochet Sweater offers intermediate crocheters an opportunity to practice making a garment from individual pieces. Its rectangular construction, half double crochet fabric, and sewn assembly provide a manageable introduction to pullover construction.
The design also leaves room for creative decisions about color, fiber, length, and ease. Careful measurement and consistent tension are particularly important because the source does not provide a numerical gauge or comprehensive size grading.
For crocheters who enjoy practical handmade clothing, this project provides a useful starting point for exploring simple sweater construction while developing confidence in garment assembly.
Conclusion
Making a Crochet Sweater is a rewarding way to turn simple stitches into a comfortable, wearable garment. With its rectangular body panels, half double crochet texture, and separate sleeves, this project offers intermediate crocheters an approachable introduction to sweater construction.
The design also provides opportunities to experiment with yarn colors, adjust the garment length, and explore different fabric textures. Consistent tension, careful measurements, and neat assembly are essential for achieving a balanced finished result.
Whether you’re creating a casual pullover for yourself or a thoughtful handmade gift, this sweater combines practical crochet techniques with the satisfaction of making something you can wear.
Frequently Asked Questions About the Crochet Sweater
1. Is this Crochet Sweater suitable for beginners?
The project is best suited to intermediate crocheters, although confident beginners familiar with basic stitches may find its construction approachable. The main fabric uses half double crochet stitches, while the garment requires joining panels, attaching sleeves, and finishing seams. Practicing these techniques beforehand can make the process easier.
2. How can I make sure the sweater fits comfortably?
Compare the dimensions of the crocheted panels with your intended garment measurements before assembly. Allow enough ease around the bust for comfortable movement and check that the sleeves align with the armholes. Because the reference does not provide a numerical gauge, measuring your work regularly is especially important.
3. Can I use cotton yarn instead of acrylic?
Yes, cotton and cotton-blend yarns are alternatives discussed in the original article. However, cotton may produce a firmer fabric with less elasticity than acrylic. Make a small sample to evaluate the texture, drape, and dimensions before committing to the full sweater.
4. How should I wash and store my finished sweater?
Always follow the care instructions on your yarn label. The original article generally recommends gentle washing in cold water and drying the garment flat. Once completely dry, fold the sweater for storage to help prevent stretching. Avoid excessive heat, particularly when working with acrylic fibers.
Leave a Reply